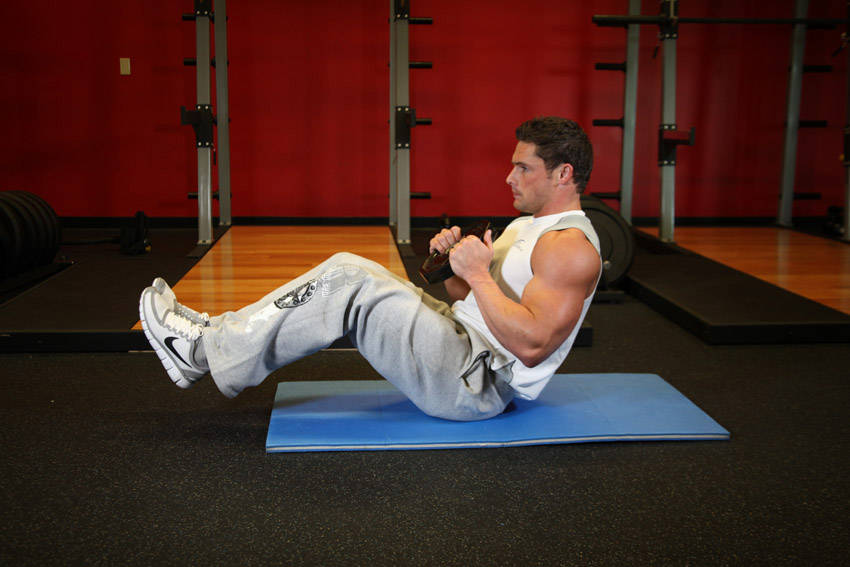
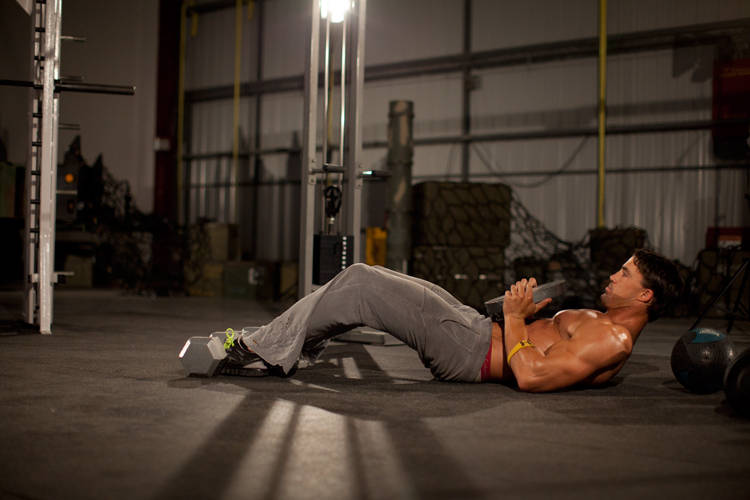
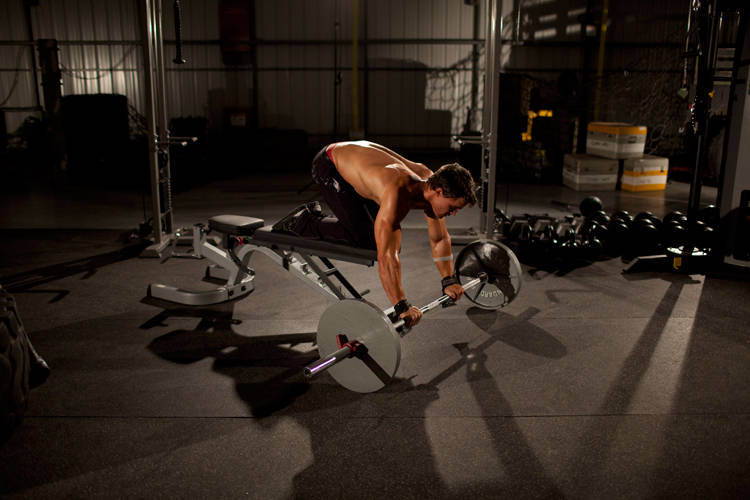
Breathing
Exhale as you pull through the working range and inhale during the controlled return. Keep the breath steady and avoid straining with a prolonged breath hold.
Getting your next view ready…
The Ab Roller primarily works the abdominals, with the shoulders supporting the movement. It is a strength movement performed with other.
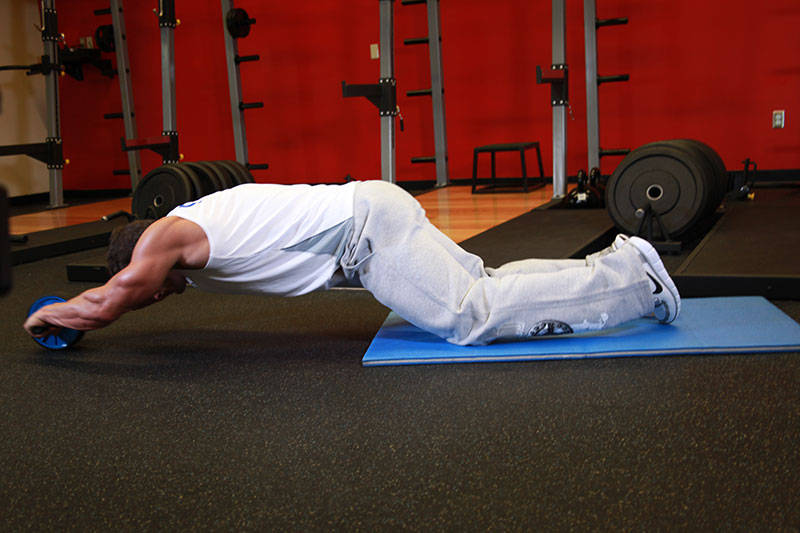 1 / 2
1 / 2How to
Movement instructions
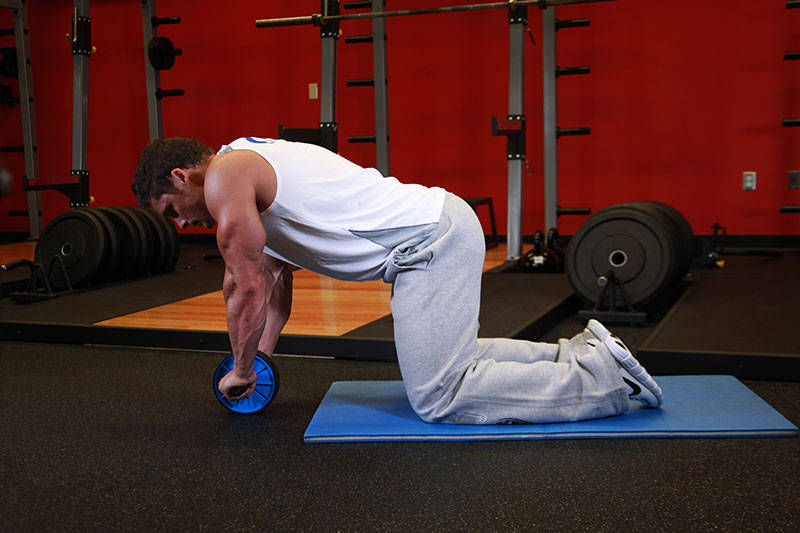
Hold the Ab Roller with both hands and kneel on the floor.
Now place the ab roller on the floor in front of you so that you are on all your hands and knees (as in a kneeling push up position). This will be your starting position.
Slowly roll the ab roller straight forward, stretching your body into a straight position. Tip: Go down as far as you can without touching the floor with your body. Breathe in during this portion of the movement.
After a pause at the stretched position, start pulling yourself back to the starting position as you breathe out. Tip: Go slowly and keep your abs tight at all times.
Technique guidance
Exhale as you pull through the working range and inhale during the controlled return. Keep the breath steady and avoid straining with a prolonged breath hold.
General guidance based on the exercise and equipment. It is not personal coaching or medical advice.
Your progress
Keep the same other setup, range of motion and recording method when comparing Ab Roller sessions.
Weight, repetitions and completed sets.
Example: 3 sets of 8 reps at 30 kg. Next time, record the actual result, even if it is the same.
Look for more repetitions at the same weight, or a heavier weight for comparable repetitions. Total weight lifted also changes when you add sets, so it is not a strength score.
Read the tracking guideThe examples show how to keep a record. They are not workout targets or a personalised training plan.
See how Jijibisha tracks your progressMuscles
Muscle guide
Abdominals is the primary muscle group. The lighter highlights show the supporting muscles involved in the movement.
In depth
The ab roller is a compact piece of exercise equipment used to perform one of the most challenging bodyweight core movements: the ab wheel rollout. From a kneeling position, you roll the wheel forward while keeping your trunk braced, then pull it back toward your knees without allowing your lower back to collapse.
It may look like a simple forward and backward movement, but a controlled rollout requires coordination from your shoulders to your hips. Your abdominal muscles must prevent the lower back from arching as your body moves farther from its base of support. Your lats, shoulders, chest, arms, hip flexors, and glutes also contribute to keeping the wheel stable and returning you to the starting position.
The ab roller is not only for advanced athletes, but beginners should not attempt the longest possible rollout immediately. The exercise becomes much harder with every extra centimetre of forward travel. Start with a short range, keep your ribs and pelvis controlled, and extend farther only when you can return without pain or loss of position.
Quick answer: Kneel on a padded surface and hold the ab roller beneath your shoulders. Tighten your abs, squeeze your glutes, and keep your ribs pulled down. Roll forward slowly while your shoulders and hips move together. Stop before your lower back begins to arch, pause briefly, then pull the wheel back toward your knees under control.
An ab roller, also called an ab wheel, is a small wheel with a handle extending from each side. You grip the handles and roll the wheel across the floor while your body provides the resistance.
Some models use a single narrow wheel. Others use two or more wheels to create a wider and more stable base. Certain ab rollers include resistance springs, automatic return mechanisms, elbow supports, or foot straps.
The equipment can be used for several exercises, but the kneeling ab wheel rollout is the most common.
During a rollout, the wheel moves away from your knees and increases the distance between your hands and your base of support. This creates a progressively larger challenge for your trunk. The farther you roll, the more force your abdominal muscles must produce to keep your lower back from extending.
An ab roller does not need to be expensive or complicated. A basic wheel that rolls smoothly, supports your weight, and has secure handles is enough for effective training.
The ab wheel rollout is an anti-extension core exercise.
Anti-extension means that your abdominal muscles work to prevent your spine from moving into excessive extension. In practical terms, they stop your lower back from sagging and arching as your arms travel forward.
This is different from a crunch or sit-up. During those exercises, your torso actively bends forward. During a rollout, the main objective is to keep the trunk relatively stable while your shoulders and hips change position.
You can think of the ab wheel rollout as a moving plank. A plank holds your body in one position. A rollout gradually lengthens your body away from its base of support, then requires you to reverse the movement.
The standard exercise shown on this page is performed from the knees. More advanced versions can begin from a standing position, but the standing rollout requires considerably more strength and control.
The ab roller is usually classified as an abdominal exercise, but it involves several muscle groups.
The rectus abdominis is the long abdominal muscle running down the front of your torso. It is commonly associated with the visible six-pack structure.
During the rollout, the rectus abdominis works primarily to prevent the lower back from arching as your arms move away from your knees. It also helps control the return.
The muscle is placed under greater demand as the wheel moves farther forward because the lever acting against your torso becomes longer.
The transverse abdominis is a deeper abdominal muscle that wraps around the trunk.
It contributes to abdominal bracing and helps create stiffness through the midsection. You may not feel it as clearly as the rectus abdominis, but it forms an important part of the support system that keeps the torso controlled.
The obliques run along the sides of the abdomen.
They help prevent unwanted rotation and side bending as the wheel moves. Their stabilizing role becomes especially important if the wheel wobbles or your pressure on the handles becomes uneven.
Diagonal and single-arm rollout variations increase the rotational challenge, but the obliques are still active during a standard straight rollout.
The latissimus dorsi, commonly called the lats, are the large muscles running along the sides of your back.
They contribute to shoulder extension and help pull the wheel back toward the starting position. They also connect the upper body to the pelvis through the trunk and assist with maintaining a strong body position.
It is normal to feel the lats working. The exercise becomes less effective for the abs only when you lose trunk control and treat it primarily as an arm pull.
The serratus anterior helps control the shoulder blades against the rib cage.
During the rollout, it supports stable shoulder movement as your arms reach forward. Good serratus control can help prevent the shoulder blades from collapsing together or lifting excessively from the rib cage.
The deltoids stabilize the arms as the wheel moves forward and backward.
The shoulders experience more demand as your body approaches a longer position. Anyone with limited shoulder mobility or a history of shoulder discomfort should begin with a short range.
The pectoral muscles contribute to controlling the upper body, particularly as the shoulders move toward an overhead position.
You may feel the chest working more during long rollouts or static holds near full extension.
The triceps help keep the elbows extended, while the forearms maintain your grip on the handles.
The elbows should remain mostly straight, but they do not need to be aggressively locked.
The hip flexors help control the relationship between the thighs, pelvis, and torso.
They may contribute during the return, particularly if you pull your hips backward quickly. Excessive hip-flexor involvement often occurs when the movement becomes a hip hinge rather than a controlled rollout.
The glutes help control pelvic position.
Squeezing them gently before and during the rollout can reduce the tendency for the pelvis to tilt forward and the lower back to arch.
The spinal erectors run along the back of the spine.
They contribute to trunk stability but should not feel like the main working muscles. Strong pressure or pain in the lower back usually means the rollout range is too long or the abdominal brace has been lost.
The primary purpose of the ab roller is to train the core, but the movement involves much of the body.
Your hands hold the wheel. Your shoulders support the upper body. Your lats help control and reverse the rollout. Your abdominal muscles resist spinal extension. Your glutes stabilize the pelvis. Your knees remain fixed against the floor.
This coordinated effort is why the exercise can feel much harder than an isolated crunch.
It is reasonable to describe the ab roller as a compound core exercise. The abs are the main target, while the upper body and hips provide support and movement control.
Inspect the ab roller before starting.
The wheel should rotate smoothly without catching or wobbling excessively. Make sure the handles are secure and free from sweat, oil, or damage.
Choose a floor that allows the wheel to roll predictably. Very slippery surfaces can cause the wheel to move faster than expected. Thick carpet may create uneven resistance.
Clear enough space in front of you for the planned range of motion.
Kneel on an exercise mat, folded towel, or dedicated knee pad.
The surface should provide enough cushioning to keep your knees comfortable without being so soft that you become unstable.
Position your knees approximately hip-width apart. A slightly wider position may provide more stability while learning.
Grip one handle in each hand with your palms facing each other.
Keep your wrists in a comfortable, relatively straight position. Avoid allowing them to collapse sharply toward the floor.
Your grip should be secure, but you do not need to squeeze the handles as hard as possible.
Begin with the ab roller on the floor in front of your knees.
Your hands should be beneath or slightly ahead of your shoulders. Your arms should remain mostly straight.
Starting with the wheel too far away can make the first repetition unnecessarily difficult.
Move your hips slightly forward from your knees.
Avoid sitting back toward your heels. Starting with the hips too far behind the knees makes it easier to perform the movement by simply rocking the hips.
Your body should form a gentle diagonal line from your knees through your hips and shoulders.
Gently tuck your pelvis and squeeze your glutes.
This does not mean rounding your entire back as much as possible. The goal is to prevent the pelvis from tipping forward and creating a large arch in the lower back.
Think about pointing the front of your belt slightly upward.
Bring the lower ribs toward the pelvis and tighten your abdomen.
Brace as though you are preparing for someone to press against your stomach. Maintain enough tension to keep the torso stable while continuing to breathe.
Do not begin rolling until you feel control through your midsection.
Push the wheel forward a few centimetres.
Allow your shoulders and hips to move together. Your torso should lengthen as one controlled unit.
Do not leave your hips behind while only your arms move. Do not allow your hips to drop ahead of the rest of your body.
Maintain a small, natural softness in the elbows.
Bending and straightening the elbows repeatedly turns part of the movement into an arm exercise and changes the intended leverage.
Think of your arms as long supports connecting your torso to the wheel.
Roll forward until you reach the farthest position you can control.
Stop immediately if:
Your first controlled range may be short. That is normal.
Pause for approximately one second at your farthest controlled position.
Keep your abs and glutes engaged. Do not relax and hang from your shoulders.
A pause helps confirm that you own the position rather than relying on momentum.
Exhale and pull the wheel toward your knees.
Think about drawing your ribs and pelvis toward each other while your lats guide the arms back. Keep the torso connected and avoid throwing your hips backward first.
Your shoulders and hips should return together.
Return to the starting position without sitting completely onto your heels.
Re-establish your abdominal brace, glute tension, and rib position. Begin the next repetition only when you feel stable.
Use a small number of cues that make sense to you.
The most important cue is simple: stop before your lower back arches.
Roll only as far as you can maintain your trunk position.
The correct distance is different for each person. It depends on:
A longer rollout is not automatically a better repetition. A short rollout performed with complete control is more useful than a long rollout that ends with the hips sagging and the lower back arching.
As you become stronger, the wheel will gradually travel farther while your position remains unchanged.
Your lower back should remain controlled without falling into excessive extension.
Some people use the cue “keep your back flat.” Others prefer a slightly rounded or hollow position. The exact appearance can differ based on anatomy and coaching style.
The main objective is to prevent the lower back from sagging.
A useful position includes:
Do not force an exaggerated rounded posture if it causes discomfort or prevents normal shoulder movement. Focus on maintaining the trunk position you established before the wheel started moving.
Yes, but they should move with the rest of your body.
The hips travel forward and downward as the wheel moves away. They return as the wheel comes back.
The mistake is allowing the hips to move independently.
If your arms roll forward while the hips stay behind, the exercise becomes easier and resembles a shoulder stretch. If your hips fall toward the floor before the shoulders move, the lower back may take excessive stress.
Aim to keep the shoulders, torso, and hips connected throughout the repetition.
Breathing during a demanding core exercise can feel difficult because the abdominal muscles are already braced.
A practical pattern is:
Avoid holding your breath for an entire set.
A brief breath hold may occur naturally during a hard portion of the movement, but prolonged straining can cause dizziness or make it difficult to maintain consistent repetitions.
This is the most common mistake.
The wheel continues moving even after the abdominal muscles can no longer control the spine. The hips fall, the lower back arches, and returning becomes difficult.
Shorten the rollout. Place a wall, box, foam roller, or other stable object in front of the wheel to create a clear stopping point.
Move the target slightly farther away only after you can complete every repetition cleanly.
A visible increase in the lower-back curve usually means you have lost the anti-extension position.
Reset by pulling your ribs down, tightening your abs, and squeezing your glutes. Reduce the range until you can maintain that position.
Do not continue rolling forward in the hope that the back will correct itself.
When the hips move toward the floor, your body loses its connected plank shape.
This places more stress on the lower back and can make the return depend heavily on the hip flexors.
Keep the hips aligned with your torso. End the repetition before they begin to drop.
Some people complete the return by pushing their hips toward their heels while the wheel stays in front.
This reduces abdominal tension and turns the movement into a rocking pattern.
Pull the wheel and hips back together. Finish with the hips slightly forward rather than resting on the heels.
Rolling the wheel with the arms while the torso remains upright creates a shoulder movement rather than a complete rollout.
Allow the entire body to lengthen from the knees.
The hips, torso, shoulders, and hands should all change position.
Repeatedly bending the elbows shortens the lever and allows the arms to take over.
Keep the elbows mostly straight throughout the movement.
Use a shorter rollout if straight arms make the current range too difficult.
The lats and shoulders should contribute, but the abs must continue controlling the trunk.
Think about pulling your ribs toward your pelvis as the wheel returns. Do not treat the exercise like a rowing movement.
Hanging passively at the end of the rollout can place excessive stress on the shoulders and lower back.
Maintain abdominal, glute, and shoulder tension. If you cannot pause briefly with control, the range is too long.
Speed can hide weak positions.
A fast rollout may carry you beyond your controllable range before you notice the lower back arching. A rushed return often depends on momentum.
Use a slow forward roll and a deliberate return.
Lifting your head to look ahead can encourage the neck and upper back to extend.
Keep your neck in line with your torso and look toward the floor.
Your gaze should move naturally as the wheel travels.
Tucking the chin aggressively can create neck tension and excessive upper-back rounding.
Keep the neck relaxed rather than forcing it into either extreme.
Allowing the shoulders to rise toward the ears can create unnecessary neck tension.
Keep the shoulders controlled and press firmly through the handles.
A wheel that drifts left or right may indicate uneven pressure, fatigue, or poor control.
Slow down and think about pushing both handles equally. Use a wider wheel if stability is a major limitation.
Trying to complete several repetitions on one breath can cause dizziness and make the exercise feel harder than necessary.
Reset your breath between repetitions.
The ab roller is highly dependent on technique.
A set should end when your position changes, even if you have not reached the planned number. Five strong repetitions are more useful than fifteen repetitions with a collapsing lower back.
The exercise becomes harder because your body creates a longer lever as the wheel rolls forward.
Near the starting position, your hands and shoulders are relatively close to your knees. Your abdominal muscles can maintain the position with less effort.
As your arms move farther away, more of your body weight acts against your trunk. Your shoulders also move into a more demanding position, and the wheel provides only a narrow, moving contact point with the floor.
The challenge increases gradually rather than all at once. This is why a difference of only a few centimetres can determine whether you complete the repetition or lose your position.
The main benefit is the ability to resist excessive spinal extension.
This type of control is useful whenever your arms or legs move while your torso must remain stable.
The exercise becomes progressively harder as the wheel moves forward.
You can adjust the challenge without adding weight simply by changing the range.
A correct rollout requires the shoulders, trunk, hips, and arms to work together.
You must create tension in several areas while still allowing smooth movement.
Your shoulders support part of your body weight as the wheel travels forward.
The demand increases with range, making the exercise useful for people who already have comfortable, healthy shoulder movement and want a greater stability challenge.
You can progress by:
The exercise offers many ways to improve without changing equipment.
An ab roller is small and easy to store.
It can be used at home, in a gym, or while travelling, provided you have a safe surface and enough forward space.
You can track:
A wall or marker can help you measure range consistently.
Many common ab exercises involve bending the torso.
The ab roller trains the core in a different way by asking it to prevent unwanted movement while the arms and hips travel.
The wheel may be simple, but controlling it requires a foundation of core and shoulder strength.
Beginners may need to practise planks, dead bugs, body saws, stability-ball rollouts, or partial wheel rollouts first.
The wheel does not stop automatically when your core reaches its limit.
A person can roll several centimetres beyond their controllable range before realizing that the lower back has started to arch.
Longer rollouts require the arms to move farther overhead.
A person with restricted or painful shoulder movement may compensate by arching the back.
The handles place the wrists in a weight-bearing position.
A model with angled or padded handles may feel more comfortable, but wrist pain should not be ignored.
The ab roller primarily challenges anti-extension.
A balanced core program should also include exercises that train resistance to rotation and side bending, along with controlled trunk flexion when appropriate.
The exercise can strengthen and develop the abdominal muscles, but it cannot selectively remove fat from the stomach.
Visible abdominal definition depends on muscle development, body-fat levels, genetics, nutrition, total activity, sleep, and consistency.
The ab roller can be introduced to beginners, but the exercise must be scaled.
A beginner should not be expected to roll until the body is close to the floor. The first goal is to learn how to keep the ribs, pelvis, and lower back controlled during a short rollout.
A suitable beginner version may move the wheel only 15 to 30 centimetres.
You are ready to increase the range when you can:
There is no need to rush toward a full kneeling or standing rollout.
The dead bug teaches you to move the arms and legs while maintaining control of the ribs and pelvis.
This is a useful introduction to anti-extension training.
The plank develops basic trunk stiffness.
You should be able to maintain a stable plank without the lower back sagging before attempting long wheel rollouts.
The body saw moves the body forward and backward while you hold a plank position.
It resembles the changing leverage of a rollout but uses a more stable base.
A large exercise ball provides more support and sits higher from the floor.
The movement can be easier to control than a small wheel.
A hand walkout begins from standing or a crouched position.
You walk the hands forward into a plank and then return, allowing you to practise increasing the lever gradually.
The hollow hold teaches rib and pelvic control in a position where the arms and legs extend away from the torso.
It can help you understand the trunk position required during a rollout.
Kneel and place both hands on the wheel.
Move the hips forward slightly and hold the starting position without rolling.
Practise keeping the ribs down, glutes engaged, and elbows straight.
Hold for 10 to 20 seconds.
Roll the wheel forward only a small distance.
Pause and return before the lower back changes position.
Perform sets of three to six repetitions.
Position yourself facing a wall.
The wall stops the wheel at a fixed distance and prevents you from rolling farther than planned.
Start close to the wall. Move your knees slightly farther away as you become stronger.
Roll beyond the short beginner range while maintaining the same trunk position.
Increase distance gradually rather than attempting a full rollout suddenly.
Continue until your arms approach an overhead position and your body forms a long line from the knees through the shoulders.
A full rollout is not defined by touching the floor. It is the longest range you can control without losing your trunk position.
Hold the farthest position for one to three seconds.
This removes momentum and requires greater control.
Take three to five seconds to roll forward and another two to four seconds to return.
Begin from standing, hinge forward, and place the wheel on the floor.
Roll only a short distance before returning.
Standing rollouts create much greater leverage and should be treated as an advanced exercise.
Use a wall to limit the standing rollout distance.
Gradually increase the space between your feet and the wall.
Roll from standing until your body approaches a long, nearly horizontal position, then return without placing the knees on the floor.
This variation requires substantial core, shoulder, lat, and hip control. It is not necessary for most training goals.
This is the simplest and most effective regression.
Move only as far as you can maintain perfect control.
A wall gives you a predictable stopping point.
It also reduces the fear of rolling farther than you can recover from.
A wheel with a wider base reduces side-to-side instability.
This allows you to focus more on controlling the trunk.
Some models provide assistance during the return.
They can help beginners learn the pattern, although you should still maintain abdominal tension.
Attach a resistance band behind you and loop it around your torso or the ab wheel according to the equipment setup.
The band provides more assistance as you move farther forward.
Make sure the anchor is secure.
Place your forearms on a large exercise ball and roll the ball forward.
The higher and wider surface usually makes the movement easier than an ab wheel.
Rolling along a bench, ramp, or raised surface can reduce the proportion of body weight acting against you.
The equipment must be stable and must allow the wheel to move safely.
Roll forward slowly, then place your hands or body down safely instead of pulling back.
Reset to the starting position before the next repetition.
This allows you to train the lowering portion while building strength for the return.
Move the wheel a little farther while preserving the same position.
This should be the first progression for most people.
Take three to five seconds to reach your farthest point.
The slower pace removes momentum and increases time under tension.
Hold the extended position for one to three seconds.
Do not allow your hips to sink during the pause.
Pull the wheel back gradually rather than rushing.
Bringing the knees closer together reduces your base of support and increases the stability demand.
A narrow wheel requires more side-to-side control.
A weighted vest increases resistance without interfering with the path of the wheel.
Use only a small amount of weight and reduce your rollout distance initially.
Anchor a resistance band behind the ab wheel so tension increases as the wheel travels forward.
Check that the band and anchor are secure.
Roll slightly toward one side, return to the centre, then repeat toward the other side.
This increases the anti-rotation demand.
Moving from kneeling to standing greatly increases the difficulty.
Use partial standing rollouts before attempting a full repetition.
This is the standard version and the best choice for most trainees.
The knees remain on the floor while the wheel moves forward and backward.
Roll until the wheel touches a wall.
This variation creates a repeatable range and helps prevent accidental overextension.
Begin from standing, place the wheel on the floor, and roll forward without putting the knees down.
This is an advanced progression.
Load a barbell with round plates and kneel behind it.
Hold the bar approximately shoulder-width apart and roll it forward.
Larger plates raise the bar farther from the floor and may make the movement more manageable.
Place your forearms or hands on a stability ball.
Roll the ball forward while maintaining trunk control.
The wider support makes it a useful regression.
Hold suspension straps and lean forward while extending the arms overhead.
Adjusting your body angle changes the difficulty.
Place your hands or forearms on sliders or towels.
Slide forward and return while keeping the torso braced.
This works best on a smooth surface.
Roll forward and slightly to one side.
Return to the centre and alternate directions.
Keep the pelvis facing the floor rather than rotating.
Use specialized equipment or a suitable single-arm roller.
The variation creates a strong anti-rotation challenge and should be attempted only after mastering bilateral rollouts.
Hold the starting position with your hands on the wheel.
The unstable support makes it more challenging than a standard plank.
Place the feet in straps or on a wheel designed for foot use.
Begin in a plank position and pull the knees toward the chest.
This is a different movement from the standard rollout.
From a plank with the feet attached to the wheel, raise the hips while keeping the legs relatively straight.
This is an advanced variation requiring substantial shoulder and core stability.
Both exercises train the core to resist spinal extension.
A plank is a good foundation. The ab roller is a progression for people who can maintain trunk control while the arms travel forward.
The exercises train the abdominals differently.
A crunch shortens the rectus abdominis by flexing the torso.
The ab roller asks the abdominal muscles to prevent the torso from extending as the arms move forward.
Neither exercise makes the other unnecessary. A complete program can include both trunk flexion and anti-extension work.
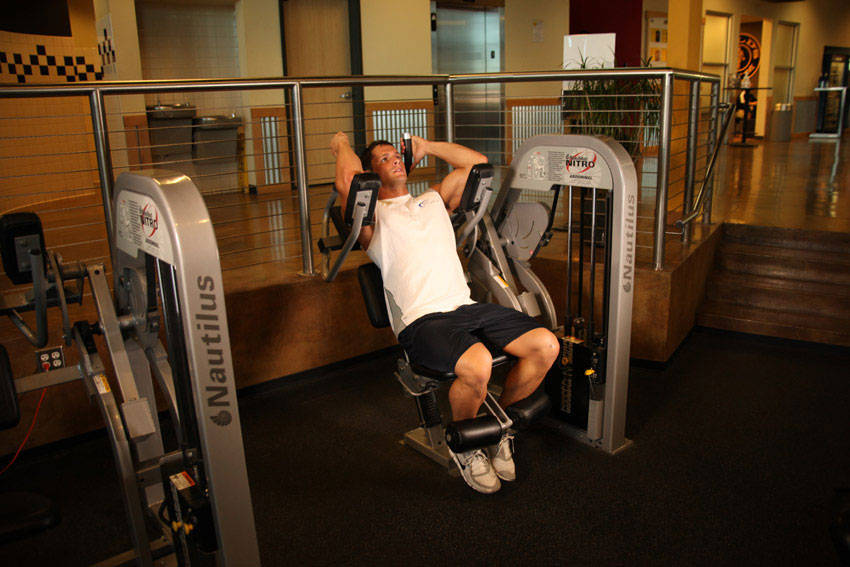
The ab crunch machine provides adjustable resistance through a guided trunk-flexion movement.
The ab roller uses body weight, changing leverage, and a less stable path.
Choose the machine when you want resistance that can be adjusted through a weight stack. Choose the wheel when you want an anti-extension exercise that also challenges the shoulders and lats.
The 3/4 sit-up involves repeatedly raising and lowering the torso.
The ab roller keeps the torso more stable while the arms and hips move.
The sit-up uses more active spinal and hip flexion. The rollout places greater emphasis on preventing the lower back from extending.
A hanging leg raise requires you to support the body from a pull-up bar while lifting the legs or pelvis.
It challenges grip, shoulder stability, hip flexors, and abdominal control.
The ab roller supports the body through the wheel and knees. It is easier on the grip but places significant demand on forward shoulder movement and anti-extension strength.
A cable crunch allows you to increase resistance through a weight stack and actively flex the spine.
The ab roller changes difficulty mainly through leverage and range of motion.
Cable crunches are easier to load in small increments. Ab rollouts require more whole-body stability.
The body saw is performed from a plank position while the body slides forward and backward.
It trains a similar anti-extension pattern without requiring the arms to move through as large a range.
The body saw can be a useful preparation exercise before full ab wheel rollouts.
The ab roller should be programmed according to your current range and technique.
| Goal | Sets | Repetitions | Rest |
|---|---|---|---|
| Learn the movement | 2 to 4 | 3 to 6 partial reps | 60 to 120 seconds |
| General core strength | 3 to 4 | 5 to 10 reps | 60 to 120 seconds |
| Abdominal muscle development | 3 to 5 | 6 to 12 reps | 60 to 150 seconds |
| Controlled endurance | 2 to 4 | 8 to 15 reps | 45 to 90 seconds |
| Advanced standing rollout | 3 to 5 | 2 to 6 reps | 90 to 180 seconds |
These are starting guidelines.
Do not extend a set after your lower back begins to arch. Stop when you lose your established trunk position, even if your abs still feel capable of more repetitions.
Beginners often progress faster by performing several small sets rather than one long set.
Two or three sessions per week are enough for many people.
The appropriate frequency depends on:
A light practice session using short rollouts may be performed more often than a demanding session with long or standing rollouts.
You do not need to use the ab roller every day to improve.
This is the most practical position for many people.
Complete your main compound exercises first, then perform two to four sets of rollouts.
Place the exercise near the beginning when improving the rollout is a major goal.
You will have more abdominal and shoulder strength available before fatigue builds.
A small number of easy rollouts can be used as part of a warm-up, but avoid taking the abs close to failure before squats, deadlifts, or overhead presses.
Fatiguing the core may reduce your ability to brace during later exercises.
The wheel can serve as the main core exercise in a short bodyweight session.
Combine it with movements that train rotation resistance and side stability.
A clear progression method prevents you from rolling farther based only on guesswork.
Place a wall or object in front of the wheel.
Complete all sets at the same distance. Once you can perform every repetition without losing position, move the target slightly farther away.
Choose a range such as 5 to 10 repetitions.
Your training might look like this:
| Session | Set 1 | Set 2 | Set 3 |
|---|---|---|---|
| 1 | 7 | 6 | 5 |
| 2 | 8 | 7 | 6 |
| 3 | 9 | 8 | 7 |
| 4 | 10 | 9 | 8 |
| 5 | 10 | 10 | 10 |
After reaching the top of the range, extend the rollout slightly and return to five or six repetitions.
Keep the same distance and repetitions while slowing the forward phase.
For example:
Move from:
Do not move to the next variation until the current one remains controlled across every set.
Track your sets, repetitions, range, and progression using the Jijibisha app.
Use a wall distance that allows every rollout to remain controlled.
This combines anti-extension, trunk flexion, anti-rotation, and resistance to side bending.
Rest enough to preserve technique during the standing variation.
Complete three rounds:
Rest for 60 seconds between rounds.
You can organize your exercises, repetition targets, and training days with the Jijibisha routine builder.
Lower-back discomfort often appears when the wheel moves farther than your abdominal muscles can control.
Common causes include:
Shorten the range and place a wall in front of the wheel.
Practise dead bugs, planks, and short rollouts before trying again. Stop the exercise if you experience sharp, radiating, or persistent pain.
The ab roller is not mandatory. Choose another core exercise if you cannot find a comfortable version.
The shoulders support and control the upper body during the rollout, so some muscular effort is normal.
You may feel excessive shoulder stress when:
Reduce the distance and keep the shoulders controlled.
Stop if you experience sharp pain, pinching, instability, or discomfort that continues after the set.
The lats help pull the wheel back and stabilize the shoulders.
Feeling them work is normal.
Make sure your abs remain braced and your lower back does not arch. If the movement feels entirely like an arm pulldown, reduce the range and focus on keeping the ribs and pelvis connected.
Wrist discomfort may result from:
Keep the wrists relatively straight and choose a wheel with comfortable handles.
Do not train through sharp or increasing wrist pain.
The shoulders, triceps, forearms, and lats all contribute to the exercise.
Your arms may fatigue first if:
Use shorter sets and a smaller range. Strengthen your plank and shoulder-support position separately.
Wobbling can occur because of:
Check the equipment and surface first.
If both are stable, slow down and press evenly through both handles. A wider wheel can help while learning.
The ab roller can be used safely when the range matches your current strength and mobility.
The exercise may not be appropriate for everyone.
Use extra caution if you have:
Pregnant people and those who are recently postpartum should seek individualized guidance before performing demanding rollout exercises.
Stop if you experience sharp pain, dizziness, numbness, tingling, sudden weakness, or unusual abdominal pressure.
Yes. The ab roller creates a demanding anti-extension exercise for the abdominal muscles.
Its effectiveness depends on maintaining trunk control. Rolling farther while allowing the lower back to arch does not improve the exercise.
The primary muscles are the rectus abdominis, transverse abdominis, and obliques.
The lats, serratus anterior, chest, shoulders, triceps, forearms, hip flexors, glutes, and spinal stabilizers also contribute.
It can be used by beginners when the rollout range is kept short.
Most beginners should use partial or wall-assisted rollouts before attempting a long kneeling rollout.
Begin with two to four sets of three to six controlled repetitions.
Increase repetitions or distance only when your lower back remains stable.
Most people can begin with three sets of five to ten repetitions.
The correct number is the amount you can complete without losing your abdominal brace or allowing your hips to sag.
Daily use is usually unnecessary.
Two or three focused sessions per week provide a practical starting point. Light technique practice may be performed more often if it does not create pain or interfere with recovery.
The exercise strengthens the abdominal muscles but cannot selectively remove fat from the stomach.
Fat loss requires an overall energy deficit maintained over time.
It can help strengthen and develop the rectus abdominis.
Whether the muscles become visible also depends on body-fat levels, genetics, nutrition, and total training.
The exercises train different core functions.
Sit-ups involve active trunk and hip flexion. Rollouts focus more on resisting spinal extension. A balanced program can use both.
The ab roller is generally more difficult because the lever changes as the wheel moves.
The plank is easier to learn and provides a useful foundation before rollouts.
Your body does not need to touch the floor.
Stop at the farthest point where you can keep the lower back controlled and return smoothly.
Only if you can reach that position without arching your lower back or losing shoulder control.
Partial rollouts are valid and often more appropriate.
Keep the elbows mostly straight with a small natural softness.
Do not repeatedly bend them during the rollout.
Yes. Gentle glute tension helps control the pelvis and reduces the tendency for the lower back to arch.
Look toward the floor and keep your neck aligned with your torso.
Avoid lifting the head to look far ahead.
Progress depends on your starting strength, consistency, technique, and training volume.
Measure improvement through controlled range, repetitions, tempo, and reduced compensation rather than expecting a fixed timeline.
Yes.
Load a barbell with round plates that can roll smoothly. Kneel behind it and perform the same basic rollout pattern.
Alternatives include:
You have rolled beyond your current strength.
Use a shorter distance, roll toward a wall, or perform eccentric-only repetitions until your return strength improves.
The lever becomes too demanding when the wheel travels farther than you can control.
Shorten the range and keep your hips and shoulders moving together.
A wider wheel is generally more stable from side to side.
It does not remove the anti-extension challenge, but it can make balancing the wheel easier.
They can help beginners complete the return and learn the movement.
The assistance reduces some of the difficulty, so progression should still focus on maintaining form and gradually relying less on the return mechanism.
The exercise can strengthen the abdominal muscles, but it cannot directly determine waist size.
Waist measurements are influenced by body composition, anatomy, posture, digestion, and other factors.
You should feel strong effort through the front and sides of your abdomen, with supporting work in the lats, shoulders, chest, and arms.
You should not feel sharp pain in the lower back, shoulders, wrists, or abdomen.
The ab roller is a simple tool, but the rollout is a demanding core exercise that rewards patience and precise technique.
Begin on your knees with the wheel beneath your shoulders. Pull your ribs down, brace your abdomen, and squeeze your glutes before moving. Roll forward while your shoulders and hips travel together. Stop before your lower back arches, then return without throwing your hips toward your heels.
A successful rollout is not measured by how close your body gets to the floor. It is measured by how far you can travel while maintaining control.
Start with a short range. Use a wall when necessary. Add distance gradually, and stop each set when your trunk position begins to change.
Browse more movements in the Jijibisha exercise library, create a structured plan with the routine builder, and record your progress with the Jijibisha app.
Swap it
Different equipment, same muscle
These movements also target the abdominals using something else.
Related
Related movements
Get the app
Add it to a routine, record every completed set, and keep the workout saved on your phone even when the gym has no reception.