Breathing
Exhale through the abdominal effort and inhale during the controlled return. Keep the neck relaxed and do not hold your breath.
Getting your next view ready…
The 3/4 Sit-Up primarily works the abdominals. It is a strength movement that needs no equipment.
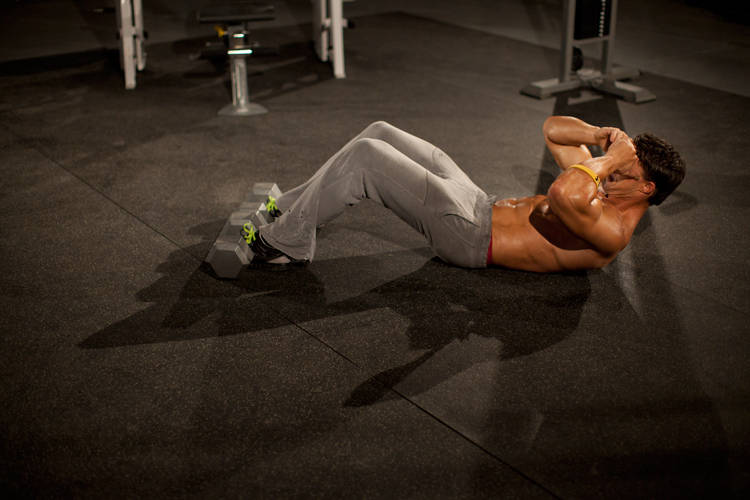
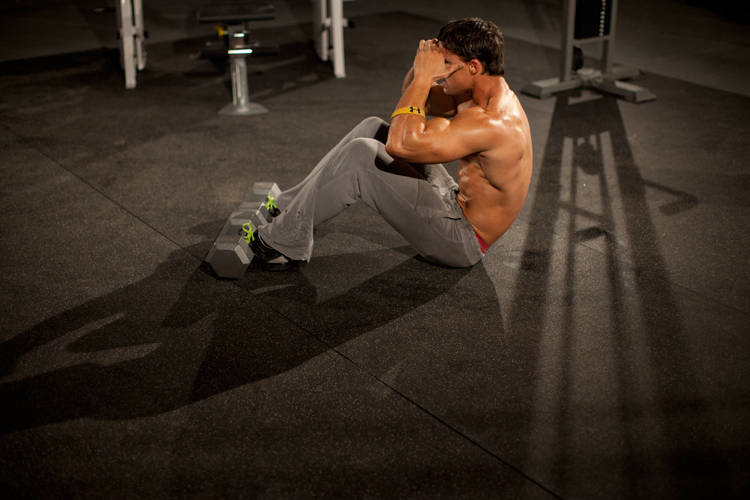 1 / 2
1 / 2How to
Movement instructions
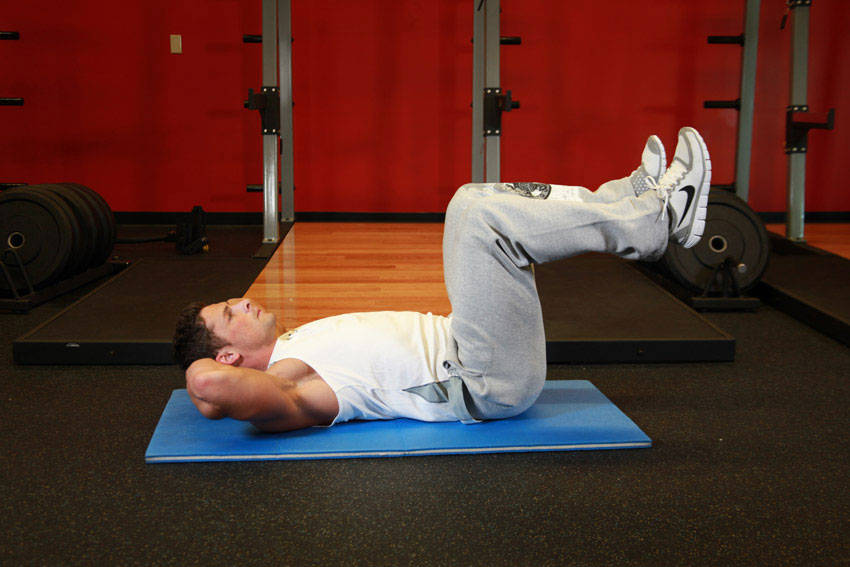
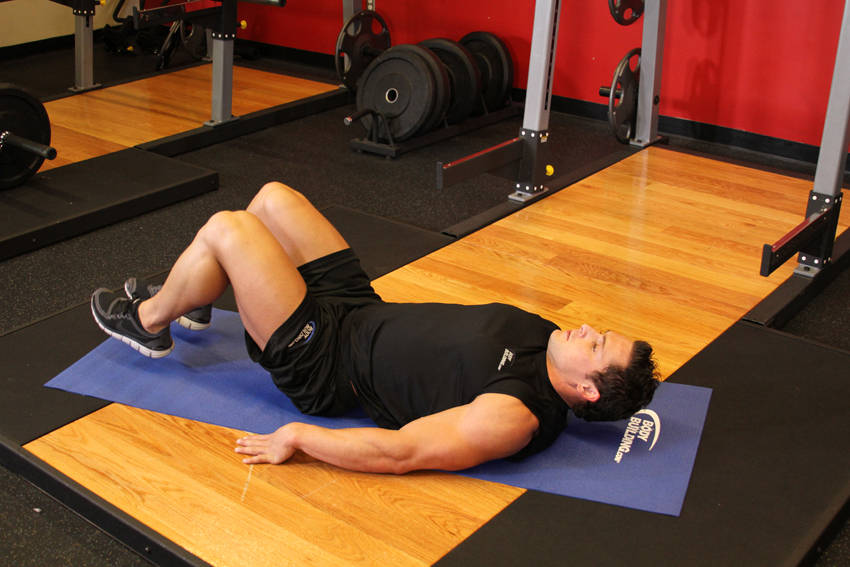
Lie down on the floor and secure your feet. Your legs should be bent at the knees.
Place your hands behind or to the side of your head. You will begin with your back on the ground. This will be your starting position.
Flex your hips and spine to raise your torso toward your knees.
At the top of the contraction your torso should be perpendicular to the ground. Reverse the motion, going only ¾ of the way down.
Repeat for the recommended amount of repetitions.
Technique guidance
Exhale through the abdominal effort and inhale during the controlled return. Keep the neck relaxed and do not hold your breath.
General guidance based on the exercise and equipment. It is not personal coaching or medical advice.
Your progress
Keep the same exercise variation, range of motion and recording method when comparing 3/4 Sit-Up sessions.
Repetitions and completed sets.
Example: 10, 9 and 8 completed reps. Keep each set separate instead of recording only the total.
Compare repetitions using the same variation and range. A different variation needs its own history; extra reps are not directly comparable if the movement changes.
Read the tracking guideThe examples show how to keep a record. They are not workout targets or a personalised training plan.
See how Jijibisha tracks your progressMuscles
Muscle guide
Abdominals is the primary muscle group. The lighter highlights show the supporting muscles involved in the movement.
In depth
The 3/4 sit-up is a bodyweight abdominal exercise that keeps the midsection working continuously between repetitions. You begin on your back with your knees bent and feet secured, raise your torso until it is nearly upright, then lower only about three-quarters of the way toward the floor.
Unlike a regular sit-up, you do not allow your upper back and shoulders to rest completely at the bottom of every repetition. Stopping short of the floor maintains tension in the abdominal muscles and removes the brief pause that often makes standard sit-ups easier.
The exercise primarily trains the rectus abdominis, with help from the hip flexors, obliques, and deeper muscles that stabilize the trunk. It requires no specialized gym equipment, although an exercise mat and a secure foot anchor make it more comfortable and consistent.
Quick answer: Secure your feet, bend your knees, and lie on your back. Contract your abs and raise your torso toward your knees until you are almost upright. Lower yourself slowly, but stop before your upper back settles onto the floor. Begin the next repetition from that elevated position.
A 3/4 sit-up, also written as a three-quarter sit-up, three-fourths sit-up, or 3/4 sit up, is a partial-range variation of the traditional sit-up.
In the version described on this page, the upward portion resembles a full sit-up. You raise your torso until it is close to perpendicular to the floor. The difference appears during the return. Instead of lowering completely and resting your back on the ground, you stop roughly three-quarters of the way down.
Your shoulders and upper back remain slightly elevated. From there, you immediately begin the next repetition.
This shortened return keeps tension on the abdominal muscles throughout the set. It also makes it harder to use the floor as a resting point or bounce into the next repetition.
The name refers to the shortened range used during the lowering phase. You travel most of the way toward the floor but stop before completing the final portion.
The exact stopping point does not need to be measured with an angle. A practical rule is to lower until your torso approaches the floor while your upper back remains elevated and your abs remain engaged.
Exercise names are not always standardized.
Some coaches use “3/4 sit-up” to describe rising only three-quarters of the way toward an upright position. Other exercise libraries, including the version used on Jijibisha, instruct you to rise fully and lower only three-quarters of the way.
Both are shortened sit-up variations, but they are not identical.
For the exercise shown here:
Following one definition consistently is more important than arguing about the name.
The 3/4 sit-up is usually classified as an abdominal exercise, but several muscles contribute to the movement.
The rectus abdominis is the main muscle targeted by the 3/4 sit-up.
It runs vertically along the front of the abdomen and is commonly associated with the appearance of a six-pack. Its primary action during the beginning of the sit-up is spinal flexion, which brings the rib cage closer to the pelvis.
The rectus abdominis also works during the lowering phase to control how quickly your torso moves toward the floor.
Because the upper back does not rest between repetitions, the muscle continues producing tension throughout most of the set.
The hip flexors help raise the torso after the initial abdominal curl.
Important hip flexors involved in a sit-up include:
As the torso rises farther from the floor, the movement includes more hip flexion. This means the hip flexors naturally contribute more than they would during a small crunch.
Securing the feet can make it easier to complete the full upward movement, but it may also increase the contribution of the hip flexors.
The internal and external obliques assist the rectus abdominis in flexing and stabilizing the torso.
During a straight 3/4 sit-up, their main role is to prevent unwanted twisting or side bending. They become more active if you add rotation, although twisting is not required for the standard exercise.
The transverse abdominis is a deeper abdominal muscle that wraps around the torso.
It contributes to bracing and helps create stability while the torso moves. You may not feel it in the same way you feel the rectus abdominis, but it still supports the exercise.
The muscles around the lower back help control spinal position and the transition between lifting and lowering.
They should not feel like the main working muscles. Strong fatigue, pinching, or pain in the lower back often indicates that the range, setup, speed, or exercise choice needs to be adjusted.
Use a flat, stable surface with enough room to move. An exercise mat can make the movement more comfortable.
Lie on your back and bend your knees. Place your feet approximately hip-width apart.
Secure them beneath a stable padded support, have a training partner hold them lightly, or use equipment designed for anchored sit-ups.
The anchor should prevent your feet from lifting without placing uncomfortable pressure across your ankles.
Avoid using unstable furniture that could move, tip, or fall during the set.
Keep your knees bent at a comfortable angle.
Your heels should be close enough that you can maintain a stable base, but they do not need to touch your glutes. A moderate bend usually feels more natural than placing the feet very far away.
Keep your knees pointing generally forward rather than allowing them to collapse inward.
There are several acceptable hand positions.
From easier to harder, you can use:
Beginners often perform the movement more cleanly with the arms across the chest.
Placing the hands behind the head increases the temptation to pull on the neck. If you use this position, keep your grip light and your elbows open.
Before lifting, gently tighten your abdominal muscles.
Think about narrowing the distance between the front of your ribs and your pelvis. Do not simply throw your head and shoulders forward.
Take a breath in while preparing, then begin exhaling as you lift.
Start the movement by flexing through the torso.
Your head, shoulders, and upper back should leave the floor in sequence. Think about curling rather than moving your torso as one completely rigid block.
Keep your neck relaxed and maintain a small, comfortable space between your chin and chest.
After the initial abdominal curl, continue raising your torso toward your knees.
Your hip flexors will assist as the angle increases. This is normal during a sit-up.
Stop when your torso is close to upright. You do not need to drive your chest into your thighs or round forward as far as possible.
At the top, keep your torso controlled rather than relaxing into a seated rest.
Inhale as you reverse the movement.
Control the descent with your abs rather than dropping your torso toward the floor. Move through the hips first, then allow the spine and upper back to approach the mat gradually.
The lowering phase is an important part of the exercise, not simply a way to return to the starting position.
Lower approximately three-quarters of the way toward the floor.
Stop while your shoulder blades and upper back remain elevated. You should still feel tension through the front of your abdomen.
Do not allow your shoulders to settle completely between repetitions.
Without bouncing or pausing for a long time, contract your abs and raise your torso again.
Continue for the planned number of repetitions. After the final repetition, lower your body fully to the mat under control.
A few simple cues can make the movement easier to understand.
You do not need to think about every cue at once. Choose one or two based on the mistake you are most likely to make.
Exhale as you raise your torso and inhale as you lower.
A useful breathing rhythm is:
Avoid holding your breath through an entire set. Breath-holding can create unnecessary tension in the neck and face, and it may make you feel lightheaded.
Your breathing does not need to sound forceful. It should remain steady enough that you can maintain control.
The 3/4 sit-up works best when each repetition is deliberate.
Try this starting tempo:
Slowing the lowering phase makes it easier to feel the abdominal muscles controlling the movement.
Once your technique becomes consistent, the exact speed can vary. The important point is to avoid dropping toward the floor or bouncing into the next repetition.
A faster pace may be used during conditioning workouts, but speed should not come at the cost of neck position, breathing, or control.
If your upper back settles completely after every repetition, you are performing something closer to a regular sit-up.
The defining feature of this variation is the shortened return. Stop before your shoulders and upper back rest.
The first repetition may begin from the floor. The repetitions that follow should begin from the elevated bottom position.
A very small lowering movement can turn the exercise into a short pulse with limited range.
Lower most of the way down while keeping control. You should approach the floor without resting on it.
The goal is not to make the range as short as possible. It is to remove the resting portion at the bottom.
Pulling the head forward with your hands may cause neck discomfort and does not improve abdominal training.
Keep your fingertips light against the sides or back of your head. Imagine that your hands are simply following your head rather than moving it.
Switch to crossed arms or forward-reaching arms if you cannot avoid pulling.
Your head should move because your torso is curling.
Do not begin each repetition by pushing your chin toward your chest. Keep the neck in a comfortable position and let the shoulders leave the floor as your abs contract.
Swinging the arms creates momentum and makes it easier to rise without producing as much force through the midsection.
Choose a fixed arm position and keep it consistent throughout the set.
If you need a counterbalance, reaching forward is acceptable, but the arms should not swing rapidly from behind the head to the knees.
Rapid repetitions often turn into rocking.
When the torso drops quickly, the rebound from the floor or hip movement can launch the body upward. This reduces control and makes it difficult to judge whether your abdominal strength is improving.
Slow down and pause briefly near the top.
Sitting fully upright and resting between repetitions removes tension from the target muscles.
Reach a tall position, but do not settle into it. Keep your ribs controlled and begin the return without leaning back or pausing for several seconds.
Hip-flexor involvement is expected during sit-ups, especially when the feet are secured.
The problem occurs when the exercise feels like nothing more than pulling the torso toward the thighs from the hips.
Initiate each repetition with an abdominal curl. Think about bringing the ribs toward the pelvis before continuing upward.
Dropping toward the mat and allowing the lower back to extend sharply can create discomfort.
Maintain abdominal tension and stop the descent before you lose control. Your lower back may naturally change position during the movement, but it should not snap into an exaggerated arch.
Breath-holding often accompanies rushed or overly difficult sets.
Reduce the number of repetitions, slow the pace, and use a steady exhale during the upward phase.
Performing 50 fast repetitions is not automatically better than completing 12 controlled repetitions.
End the set when your movement becomes noticeably shorter, faster, or more dependent on your neck and arms.
Stopping short of the floor prevents the abs from relaxing completely between repetitions.
This makes each set feel more demanding without requiring additional weight.
The exercise can be performed at home, in a gym, or while travelling.
You need only a comfortable surface and a reliable way to keep the feet secure.
The rectus abdominis must repeatedly flex the torso and control the descent.
Sets can be adjusted for strength-focused abdominal training, muscle development, or local muscular endurance.
Many people concentrate only on lifting during abdominal exercises.
The 3/4 sit-up encourages you to control the eccentric, or lowering, portion because dropping too far would cause the upper back to touch the floor.
You can record:
Using the same setup each time makes it easier to compare one workout with another.
The movement works well in home workouts, hotel-room sessions, core circuits, and short finishers after strength training.
It can also be paired with exercises that train other core functions.
The hip flexors contribute significantly as the torso rises.
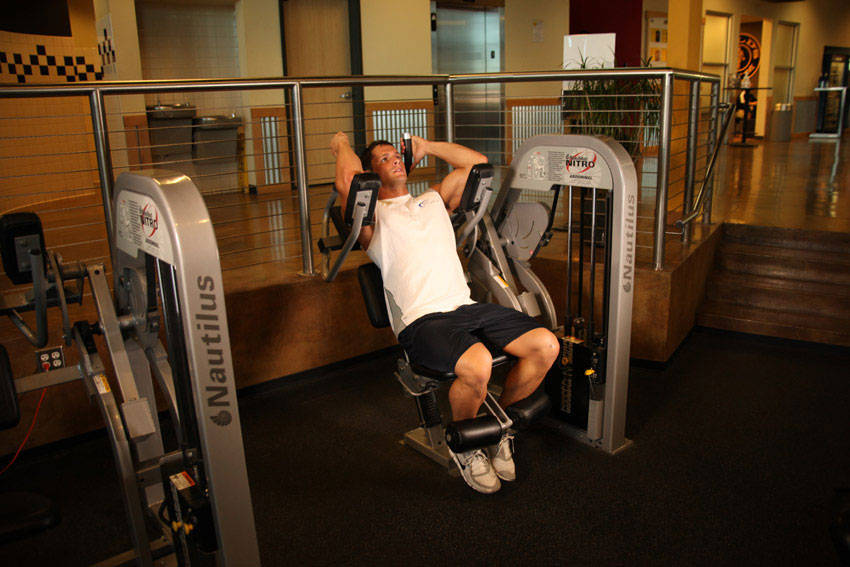
This is not necessarily a problem, but people seeking more isolated spinal flexion may prefer a crunch or an ab crunch machine.
Securing the feet makes it easier to complete the upward phase and increases the contribution of the muscles that flex the hips.
If your hip flexors fatigue before your abs, an unanchored crunch may be a better choice.
Your core does more than bend the spine forward.
It also helps resist:
For balanced core training, combine sit-up variations with exercises such as planks, dead bugs, side planks, carries, Pallof presses, and controlled rollouts.
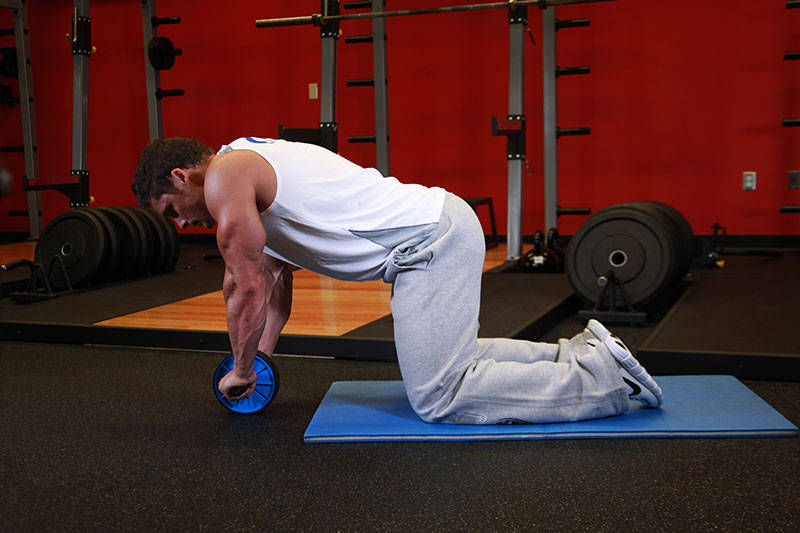
The ab roller, for example, trains the core differently by challenging your ability to resist spinal extension.
Repeated spinal and hip flexion can be uncomfortable for some people.
Individual anatomy, injury history, mobility, fatigue, and technique all affect how the movement feels. No abdominal exercise is essential. Choose a different option if this one repeatedly causes discomfort.
Your repetition target should match your current ability and training goal.
| Goal | Sets | Repetitions | Rest |
|---|---|---|---|
| Learn the movement | 2 to 3 | 6 to 10 | 60 to 90 seconds |
| General abdominal training | 3 to 4 | 10 to 20 | 45 to 90 seconds |
| Build abdominal muscle | 3 to 4 | 8 to 15 | 60 to 120 seconds |
| Muscular endurance | 2 to 4 | 15 to 30 | 30 to 75 seconds |
| Core circuit | 2 to 4 rounds | 8 to 20 | As programmed |
These ranges are starting points rather than strict rules.
A productive set should become challenging near the end while your technique remains recognizable. Stop when you can no longer control the descent or maintain the elevated bottom position.
Beginners should leave several good repetitions in reserve. More experienced trainees may work closer to muscular failure after they have learned to perform the movement consistently.
Rise only as far as you can without jerking or pulling on your neck.
Over time, gradually increase how high you lift.
Extending the arms toward the knees creates a counterbalance and makes the upward phase easier.
Keep the arms still rather than swinging them.
This is usually easier than placing the hands behind the head or extending the arms overhead.
Before using the continuous-tension version, practice ordinary bent-knee sit-ups with a brief reset on the floor.
Once your technique improves, begin stopping short on the descent.
A crunch uses a smaller range and keeps the lower back closer to the floor.
It may be a better starting point if you cannot yet lift the torso without swinging.
A light resistance band held from behind can assist the upward movement.
The band should help only enough to let you practice controlled repetitions.
Take three to five seconds to lower toward the floor.
This increases the time your abdominal muscles spend working without changing the exercise setup.
Hold the elevated bottom position for one or two seconds before beginning the next repetition.
Do not allow your upper back to touch down during the pause.
Hold the upright position briefly while keeping the abs engaged.
Avoid turning the pause into a relaxed seated rest.
Moving the arms farther from your hips increases the leverage against your abdominal muscles.
Keep the hands light and avoid pulling the head.
This creates a longer lever and can make the exercise considerably harder.
Use this version only after you can keep your ribs, neck, and lower back under control.
A light plate, dumbbell, or medicine ball can add resistance.
Hold it securely against your chest. Do not begin with the weight behind your head, as that greatly increases the difficulty and may encourage poor neck position.
Placing the head lower than the hips increases the effect of gravity.
A decline 3/4 sit-up is more challenging and should be introduced gradually.
Progress does not require adding repetitions forever.
Use a progression system that keeps the movement measurable.
Choose a target range such as 10 to 15 repetitions.
Your sessions might look like this:
| Session | Set 1 | Set 2 | Set 3 |
|---|---|---|---|
| 1 | 11 | 10 | 8 |
| 2 | 12 | 10 | 9 |
| 3 | 13 | 11 | 10 |
| 4 | 14 | 13 | 11 |
| 5 | 15 | 14 | 13 |
| 6 | 15 | 15 | 15 |
After reaching 15 controlled repetitions in every set, make the movement slightly harder.
You could add a light weight, move your arms farther overhead, lengthen the lowering phase, or pause near the bottom.
Keep the same number of repetitions but increase control.
For example:
Once bodyweight repetitions become easy, hold a small weight against your chest.
Increase resistance gradually. A small increase can make a large difference in an abdominal exercise.
Do not add weight if it causes your feet to pull aggressively against the anchor or your torso to fall during the lowering phase.
Better repetitions count as progress.
Signs of improvement include:
Track your sets and repetitions with the Jijibisha app so you can see whether your performance is improving over time.
For most people, the end of a workout is the simplest place for direct abdominal training.
Complete your main lifts first, then add two to four sets of 3/4 sit-ups.
This prevents tired abdominal muscles from affecting exercises that require strong bracing.
Place the exercise earlier when abdominal strength or development is a priority.
Warm up first, then perform your hardest abdominal movement while you are fresh.
The 3/4 sit-up can be combined with push-ups, squats, lunges, and other bodyweight exercises.
Keep the repetitions moderate enough that you can still control the lowering phase.
A few sets can be performed without a full gym session.
Pair the movement with an anti-extension exercise and a side-stability exercise for more complete core training.
Rest long enough to maintain control.
This combines spinal flexion with pelvic control, anti-extension, and resistance to side bending.
Complete three rounds:
Rest for 60 to 90 seconds between rounds.
Use loads that allow controlled repetitions rather than forcing the heaviest possible resistance.
You can organize these exercises, targets, and rest periods with Jijibisha’s routine builder.
A full sit-up usually begins with the back resting on the floor and ends with the torso upright. The person then returns completely to the floor before beginning another repetition.
The 3/4 sit-up shown here uses the same high position but stops short during the return.
Neither version is automatically better. The best choice depends on whether you want standardized full-range repetitions or a continuous-tension abdominal exercise.
A crunch lifts only the head, shoulders, and upper back from the floor. The hips usually remain relatively still.
A 3/4 sit-up raises the torso much farther and includes more hip flexion.
A quarter sit-up uses a much smaller range near the floor.
The shoulders and upper back lift slightly, but the torso does not approach an upright position. It is closer to a crunch than a full sit-up.
The 3/4 sit-up involves a larger movement and usually requires more contribution from the hip flexors.
A quarter sit-up can be a useful regression when the larger version is too difficult or uncomfortable.
The exercises train different core actions.
The 3/4 sit-up is a dynamic movement. The abdominal muscles shorten and lengthen while the spine and hips flex.
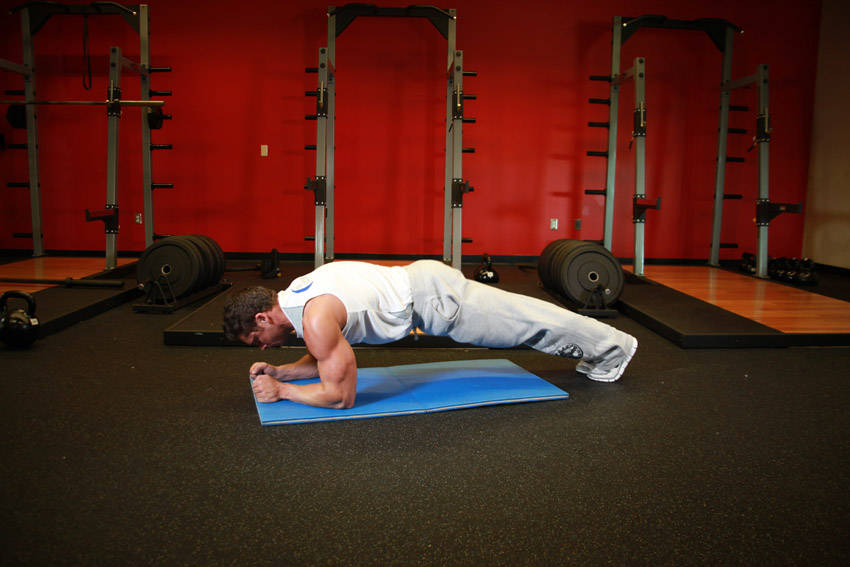
The plank is mostly isometric. The core works to prevent the spine from extending while the body remains relatively still.
A well-rounded routine can include both. One does not replace the other.
Both exercises train the front of the abdomen through repeated trunk flexion.
The ab crunch machine provides adjustable external resistance and a guided path. The 3/4 sit-up uses body weight and allows more natural movement, but progression may be less precise.
Choose the machine when you want easily measured resistance. Choose the sit-up when you want a bodyweight option with minimal equipment.
Feeling some hip-flexor activity is normal.
A sit-up combines spinal flexion with hip flexion. The hip flexors become more involved as your torso travels farther from the floor, especially when your feet are anchored.
They may dominate the exercise when:
Start each repetition by curling the ribs toward the pelvis. Slow the movement and reduce the number of repetitions.
Choose a crunch or machine crunch if your goal is to reduce hip-flexor involvement.
Neck discomfort often comes from pulling on the head, leading with the chin, or keeping the neck muscles tense for the entire set.
Try these changes:
Stop the exercise if the discomfort is sharp, persistent, or worsens with each repetition.
Possible reasons include:
Use a mat, slow the lowering phase, and stop farther from the floor. You can also switch to a smaller crunch variation.
Pain should not be treated as proof that the exercise is working. Stop if you experience sharp, radiating, or increasing discomfort.
Many people can perform 3/4 sit-ups safely when they use a comfortable range, stable setup, and controlled pace.
The exercise may not be appropriate for everyone.
Take extra care if you have:
Seek advice from a qualified healthcare professional when you are uncertain whether the movement is suitable for your situation.
Stop immediately if you experience sharp pain, numbness, radiating discomfort, dizziness, nausea, or unusual pressure.
The exercise trains the muscles beneath the abdominal fat, but it should not be treated as a dependable method for selectively removing fat from the stomach.
Fat loss is influenced mainly by overall energy balance over time. Nutrition, total daily movement, cardiovascular activity, resistance training, sleep, and consistency all contribute.
Training your abs can make the muscles stronger and more developed. Whether they become visible also depends on how much body fat covers them and how your body distributes fat.
Doing hundreds of sit-ups does not replace a complete fat-loss plan.
In the version shown on this page, you rise until your torso is nearly upright, then lower only about three-quarters of the way toward the floor.
Your upper back remains elevated so the abdominal muscles do not rest completely between repetitions.
Both definitions can be found online.
Jijibisha’s version uses a full upward movement followed by a shortened return. Rise to an upright position, then go only three-quarters of the way down.
The main target is the rectus abdominis.
The hip flexors help raise the torso, while the obliques and deeper abdominal muscles assist with trunk movement and stability.
The version shown here uses secured feet.
Anchoring makes it easier to complete the larger sit-up motion but may increase hip-flexor involvement. Use an unanchored crunch if securing the feet feels uncomfortable or shifts too much work away from your abs.
It can be, but some beginners may find the full upward movement difficult.
Start with arms reaching forward, use a smaller range, or practice ordinary crunches first. Progress to continuous repetitions only after you can control the lowering phase.
Begin with two or three sets of 6 to 10 controlled repetitions.
Increase the repetitions gradually while keeping your upper back elevated at the bottom and avoiding momentum.
A practical starting point is three or four sets of 8 to 20 challenging repetitions.
When high repetitions become easy, make the exercise harder through slower lowering, a more difficult arm position, or light external resistance.
Daily training is usually unnecessary.
Two to four abdominal sessions per week are enough for many people. Frequency should reflect your total workout volume, effort, recovery, and the other exercises in your program.
They create more continuous tension because you do not rest fully on the floor.
Regular sit-ups may be more appropriate when you need standardized full-range repetitions. Neither variation is best for every goal.
The 3/4 sit-up uses a larger range and trains the hip flexors more.
Crunches focus more closely on the initial spinal-flexion portion. Choose the movement that matches your goal and feels comfortable.
They can help develop the rectus abdominis, which forms the visible six-pack structure.
Visibility also depends on body-fat levels, genetics, nutrition, and total training. Sit-ups alone cannot guarantee visible abs.
Yes.
Hold a light plate, dumbbell, or medicine ball close to your chest. Increase resistance only after you can complete bodyweight repetitions without pulling on your neck, bouncing, or dropping toward the floor.
You need a flat surface and a secure way to anchor your feet.
An exercise mat is recommended for comfort. Added weight is optional.
Useful alternatives include:
The best alternative depends on whether you want spinal flexion, hip flexion, abdominal isolation, or core stability.
The 3/4 sit-up is a continuous-tension abdominal exercise built around a simple adjustment to the standard sit-up.
Raise your torso toward an upright position, lower slowly, and stop before your upper back reaches the floor. This shortened return removes the resting point and keeps the abdominal muscles working between repetitions.
Remember the main technique points:
Use the exercise as one part of a broader core program rather than relying on sit-ups alone. Combine it with movements that resist extension, rotation, and side bending.
Browse the Jijibisha exercise library for more movements, create a structured plan with the routine builder, and record your workouts with the Jijibisha app.
Swap it
Different equipment, same muscle
These movements also target the abdominals using something else.
Related
Related movements
Get the app
Add it to a routine, record every completed set, and keep the workout saved on your phone even when the gym has no reception.